今回は、Cloud Functions For Firebase(以後、長いのでFirebase Functionsと呼びます)にNode.jsアプリケーションをデプロイする方法についてまとめていきます。
正直、公式ドキュメントを参考に進めればあまりハマることなく進められますが、自身の備忘録としてまとめていきますので、参考程度に見ていただければと思います。
また、デプロイについては、以前Renderを使った記事もまとめていますので良かったら参考にしてください。

Firebaseについて

Firebaseとは
Firebaseは、Googleが提供するモバイルアプリおよびWebアプリケーションの開発プラットフォームです。いわゆるBaaS(Backend as a Service)の代表的な一つで、バックエンドの機能を提供してくれるサービスとも言えます。開発者はFirebaseを使用して、リアルタイムデータベース、認証、ストレージ、ホスティング、クラウド関数などの機能を簡単に統合することができます。Firebaseはクラウドベースのサービスであり、スケーラビリティに優れ、セキュリティと信頼性が高いのが特徴です。また、シンプルなAPIと直感的なダッシュボードを提供するため、開発者は迅速にアプリケーションを構築・展開・運用できます。
Firebase Functionsとは

Firebase Functions(正式には、Cloud Functions For Firebase)は、Firebaseプラットフォームの一部であり、サーバーレスのコンピューティング環境を提供します。これにより、開発者はクラウド上で実行される小さな単一機能の関数を作成し、実行することができます。Firebase FunctionsはNode.jsで書かれたJavaScriptやTypeScriptのコードを実行し、HTTPトリガーやデータベースのイベントに応答して処理を実行することができます。また、Cloud FirestoreやRealtime Databaseと連携してリアルタイムなデータ処理を実現することも可能です。Firebase Functionsはスケーラビリティが高く、自動的にスケールして負荷に応じてリソースを割り当てます。これにより、サーバーの管理やスケーリングに関する心配をせずに、アプリケーションのバックエンドのロジックを効率的に実行できます。
実装の流れ
開発環境
- Node.js:
v18.15.0 - npm:
v9.5.0 - TypeScript:
v5.1.6 - OS:
MacOS Monterey
構築手順
基本的には公式ドキュメントの手順に沿って進めていきますので、詳しくは公式を参考にしてください。
Firebaseプロジェクトのセットアップ
まずはFirebaseコンソールにアクセスし、プロジェクトを作成していきます。
※ すでに作成済みの場合は、既存のプロジェクト内でこの後の手順を進めてもOK
今回は「sample-project」という名前で登録。
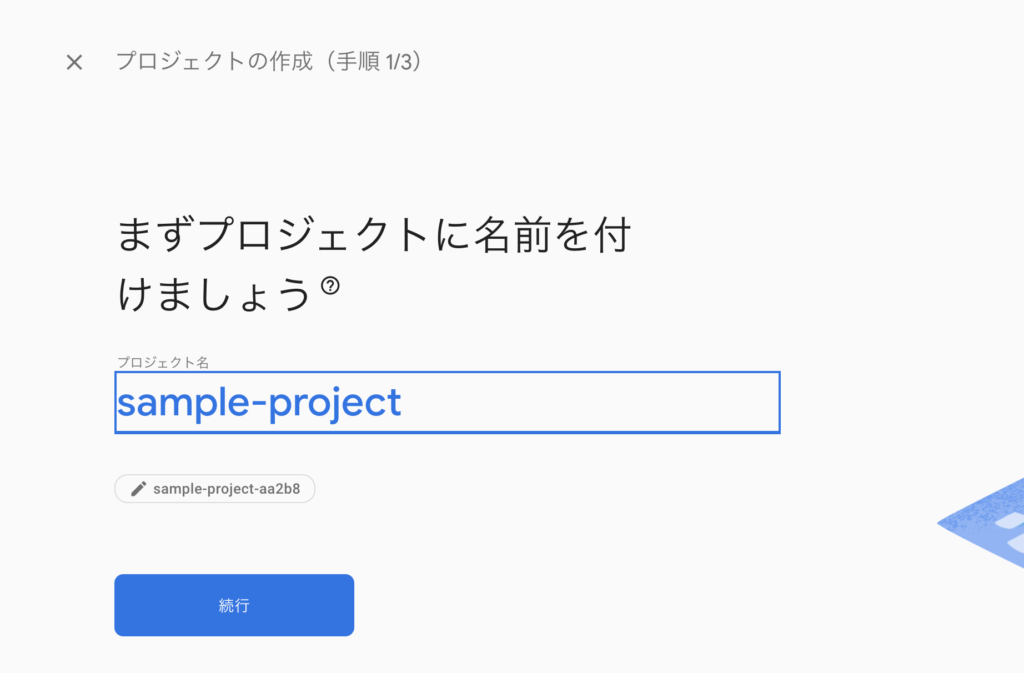
登録が完了すると、以下のような完了画面が表示される。

ローカルに実行環境構築
Node.js + npmのインストール
続いて、PCのローカル環境でプロジェクトの初期化を行っていきます。
今回はNode.jsによる実行環境で開発を進めていきますので、まだNode.js + npmが準備できていない人は以下を参考にインストールしてください。

Firebase CLI のインストール
$ npm install -g firebase-tools

$ firebase --version
12.4.6
Firebaseプロジェクトの初期化
Firebase SDK for Cloud Functions を初期化し、TypeScriptをベースとした空のプロジェクトを作成してきます。
firebase login を実行
loginコマンドを実行すると、ブラウザが起動しますので、該当のGoogleアカウントで認証します。
$ firebase login
i  Firebase optionally collects CLI and Emulator Suite usage and error reporting information to help improve our products. Data is collected in accordance with Google's privacy policy (https://policies.google.com/privacy) and is not used to identify you.

? Allow Firebase to collect CLI and Emulator Suite usage and error reporting information? No

Visit this URL on this device to log in:
https://accounts.google.com/o/oauth2/auth?client_id=563584335869-fgrhgmd47bqnekij5i8b5pr03ho849e6.apps.googleusercontent.com&scope=email%20openid%20https%3A%2F%2Fwww.googleapis.com%2Fauth%2Fcloudplatformprojects.readonly%20https%3A%2F%2Fwww.googleapis.com%2Fauth%2Ffirebase%20https%3A%2F%2Fwww.googleapis.com%2Fauth%2Fcloud-platform&response_type=code&state=175955820&redirect_uri=http%3A%2F%2Flocalhost%3A9005

Waiting for authentication...

✔  Success! Logged in as xxxxxxxx@gmail.com
空のプロジェクト作成
$ mkdir sample-functions
$ cd sample-functions
$ firebase init functions
基本的には聞かれたことに対して回答していけば問題ありません。今回はTypeScriptで実装してきますので、その選択だけ間違えないようにしてください。
ディレクトリ構成
.
├── README.md
├── .firebaserc
├── firebase.json
└── functions
    ├── lib
    │   ├── index.js
    │   └── index.js.map
    ├── package-lock.json
    ├── package.json
    ├── src
    │   └── index.ts
    ├── tsconfig.dev.json
    └── tsconfig.json
ルート直下にfunctionsディレクトリが生成され、その中にNode.js + TypeScriptによるアプリケーションが作成されます。
Functionsのコード実装
パッケージのアップデート&インストール
パッケージのバージョンが古い場合があるので、ncuコマンドで一気にアップデートしてきます。
$ cd functions
$ npm install -g npm-check-updates
$ ncu
Checking /Users/path/to/sample-project/functions/package.json
[====================] 9/9 100%

 @typescript-eslint/eslint-plugin  ^5.12.0  →    ^6.2.1
 @typescript-eslint/parser         ^5.12.0  →    ^6.2.1
 eslint                             ^8.9.0  →   ^8.46.0
 eslint-plugin-import              ^2.25.4  →   ^2.28.0
 firebase-admin                    ^11.8.0  →  ^11.10.1
 firebase-functions                 ^4.3.1  →    ^4.4.1
 typescript                         ^4.9.0  →    ^5.1.6

$ ncu -u
Upgrading /Users/path/to/sample-project/functions/package.json
[====================] 9/9 100%

 @typescript-eslint/eslint-plugin  ^5.12.0  →    ^6.2.1
 @typescript-eslint/parser         ^5.12.0  →    ^6.2.1
 eslint                             ^8.9.0  →   ^8.46.0
 eslint-plugin-import              ^2.25.4  →   ^2.28.0
 firebase-admin                    ^11.8.0  →  ^11.10.1
 firebase-functions                 ^4.3.1  →    ^4.4.1
 typescript                         ^4.9.0  →    ^5.1.6
アップデートが完了したら、アプリケーションにパッケージをインストールします。
$ npm installvoltaを利用している場合は、バージョンをpinしておきます。
"volta": {
  "node": "18.15.0",
  "npm": "9.5.0"
}
また、Nodeのバージョンを指定する場合は、package.jsonにバージョン指定の設定をします。
"engines": {
  "node": "18"
}参考:https://firebase.google.com/docs/functions/manage-functions?hl=ja&gen=2nd#set_nodejs_version
コードの実装
元々自動生成されたコードのコメントアウトを外すだけです。
これだけでデプロイが正常に行われているかを確認可能です。
import { onRequest } from 'firebase-functions/v2/https';
import * as logger from 'firebase-functions/logger';

export const helloWorld = onRequest((request, response) => {
  logger.info('Hello logs!', { structuredData: true });
  response.send('Hello from Firebase!');
});
Firebase Functionsへのデプロイ
最後に、functions配下に移動し、デプロイコマンドを実行します。
$ cd functions
$ firebase deploy --only functions
うまくいくかと思ったら、以下のエラーが発生
10:9   error  There should be no space after '{'   object-curly-spacing
10:19  error  There should be no space before '}'  object-curly-spacing
10:27  error  Strings must use doublequote         quotes
11:25  error  Strings must use doublequote         quotes
17:15  error  Strings must use doublequote         quotes
17:31  error  There should be no space after '{'   object-curly-spacing
17:52  error  There should be no space before '}'  object-curly-spacing
18:17  error  Strings must use doublequote         quotes
なので、eslintrc.jsのruluesをエラーに併せて修正します。
rules: {
  'quotes': ['error', 'single'],
  'import/no-unresolved': 0,
  'indent': ['error', 2],
  'object-curly-spacing': ['error', 'always'],
},
次こそはと思い、実行すると今度は料金プランの変更が必要だとエラーになります。
Error: Your project sample-project-aa2b8 must be on the Blaze (pay-as-you-go) plan to complete this command. Required API artifactregistry.googleapis.com can't be enabled until the upgrade is complete. To upgrade, visit the following URL:プロジェクトのページにいき、料金プランを「Blaze」の従量課金プランに変更します。
※ 今回のデプロイで料金がかかることはありませんが、詳しくは公式サイトを参考にしてください。
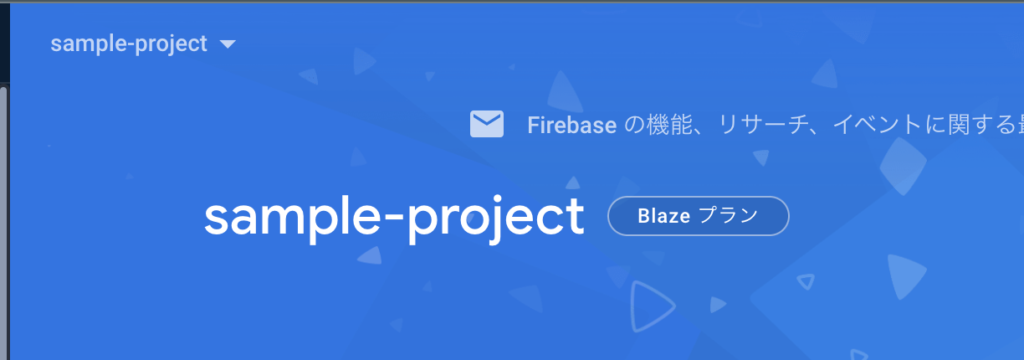
いよいよこれでデプロイが実行されます。
$ firebase deploy --only functions
=== Deploying to 'sample-project-aa2b8'...

i  deploying functions
Running command: npm --prefix "$RESOURCE_DIR" run lint

> lint
> eslint --ext .js,.ts .

Running command: npm --prefix "$RESOURCE_DIR" run build

> build
> tsc

✔  functions: Finished running predeploy script.
i  functions: preparing codebase default for deployment
i  functions: ensuring required API cloudfunctions.googleapis.com is enabled...
i  functions: ensuring required API cloudbuild.googleapis.com is enabled...
i  artifactregistry: ensuring required API artifactregistry.googleapis.com is enabled...
⚠  artifactregistry: missing required API artifactregistry.googleapis.com. Enabling now...
✔  functions: required API cloudfunctions.googleapis.com is enabled
⚠  functions: missing required API cloudbuild.googleapis.com. Enabling now...
✔  artifactregistry: required API artifactregistry.googleapis.com is enabled
✔  functions: required API cloudbuild.googleapis.com is enabled
i  functions: Loading and analyzing source code for codebase default to determine what to deploy
Serving at port 8722

shutdown requested via /__/quitquitquit

i  functions: preparing functions directory for uploading...
i  functions: packaged /Users/path/to/sample-project/functions (84.01 KB) for uploading
i  functions: ensuring required API run.googleapis.com is enabled...
i  functions: ensuring required API eventarc.googleapis.com is enabled...
i  functions: ensuring required API pubsub.googleapis.com is enabled...
i  functions: ensuring required API storage.googleapis.com is enabled...
⚠  functions: missing required API run.googleapis.com. Enabling now...
✔  functions: required API storage.googleapis.com is enabled
⚠  functions: missing required API eventarc.googleapis.com. Enabling now...
✔  functions: required API pubsub.googleapis.com is enabled
✔  functions: required API run.googleapis.com is enabled
✔  functions: required API eventarc.googleapis.com is enabled
i  functions: generating the service identity for pubsub.googleapis.com...
i  functions: generating the service identity for eventarc.googleapis.com...
✔  functions: functions folder uploaded successfully
i  functions: creating Node.js 18 (2nd Gen) function helloWorld(us-central1)...
✔  functions[helloWorld(us-central1)] Successful create operation.
Function URL (helloWorld(us-central1)): https://helloworld-ptmr6qlapq-uc.a.run.app
i  functions: cleaning up build files...

✔  Deploy complete!

Project Console: https://console.firebase.google.com/project/sample-project-aa2b8/overview
動作確認
デプロイ完了後のログに出力されるFunction URL (helloWorld(us-central1))の横に表示されるURLが今回のエンドポイントのURLとなります。
実際にアクセスし、以下のようにテキストが表示されればデプロイ成功です。

ちなみにGCPのCloud Loggingから正常にログが出力されていることも確認可能です。

まとめ
改めて今回はFirebase Functionsへのデプロイ手順についてまとめてみました。チュートリアル通りではあったので、決して難しくはないかと思います。今回は手動によるデプロイだったため、今後GithubActionsなどで自動化も試していきたいと思います。ご覧いただきありがとうございました。

